
Use Technology and Get free Professional Invoice
When you have a business, we must issue an invoice in Excel. But sometimes we have no knowledge of even creating it. Luckily, we have created a complete guide for you where we will teach you to make this type of document.

Excel Invoice:
The Microsoft Office Excel program provides us with endless pre-designed templates of excellent quality and digital resources that make our work easier. Especially, when you don't have much mastery in this tool.
Nowadays, one of the most requested categories by Excel users is the creation of personalized invoices for your business. This tax document will undoubtedly give your business a much more professional look.
Fortunately, we will show you the correct procedure to prepare an invoice in Excel. Pay close attention!
Step by step to make an Excel invoice
Open Excel interface
First, you must open the Excel program. In our case, we will be using the version of Office 2013. If you use the same, you will get the same interface as our capture.
However, if you do not use it, you may be able to observe some changes. Don't worry, it's nothing from the other world! The procedure is relatively the same.
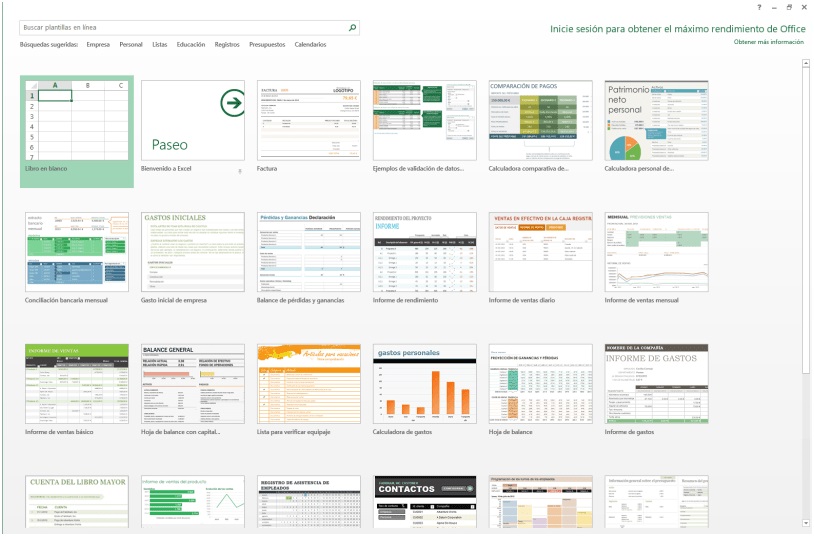
In the search box type the word invoice
Next, you need to filter the invoice templates we need in the search engine, which are available in the version of Excel you use.
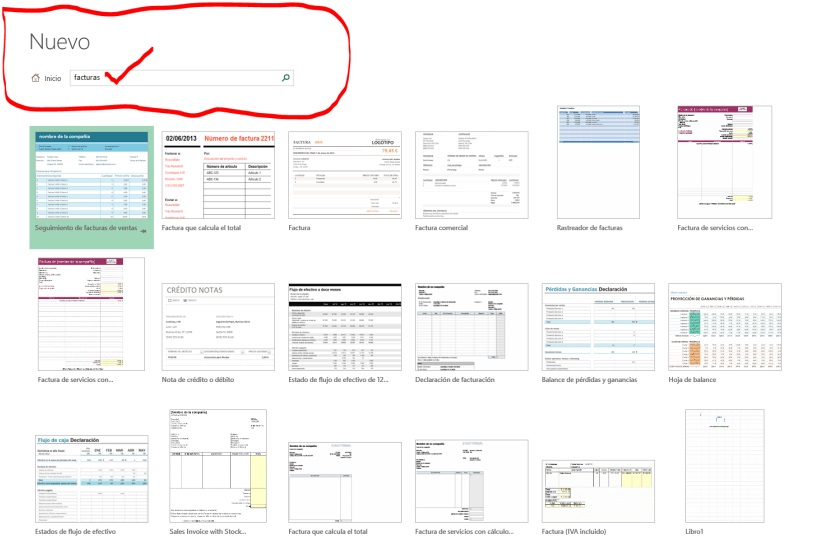
Select the invoice format you like best and fit your business
One of the great advantages that Excel has is that it gives us a variety of types of templates. All with different characteristics. Therefore, you must choose the one that best suits the needs and requirements of your venture.
We have selected the simplest of all: “ Invoice ”.

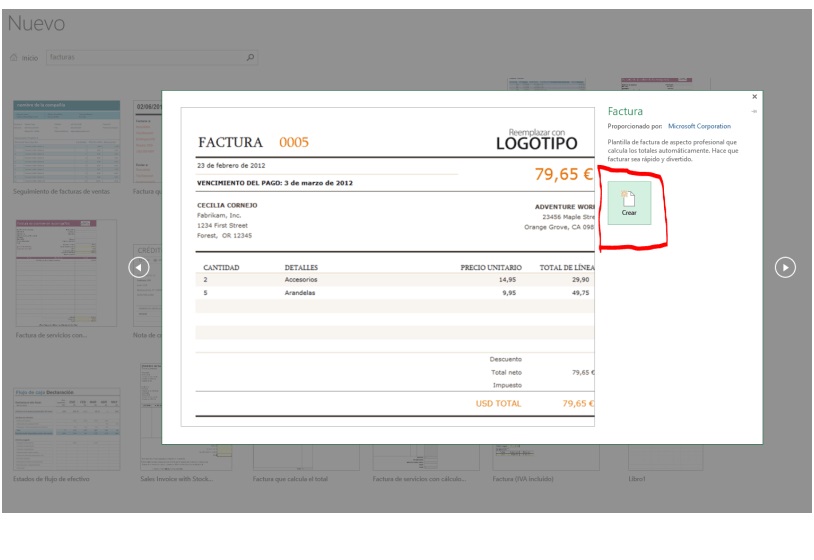
Click on the invoice format you chose
If you have already chosen your type of invoice, then it is the perfect time to click on the selected format and then click on the new dialog box that will appear on the screen and immediately click on “ Create ”
As we show below:
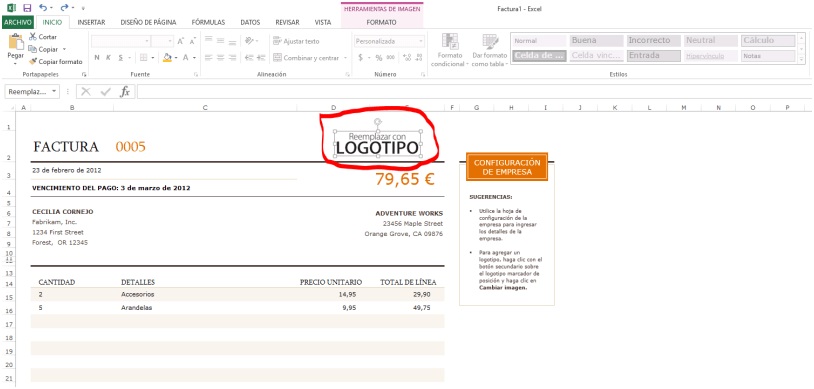
Open the excel invoice format selected in the program
Once, you have already clicked on the " Create " button, the Excel invoice format you have selected will automatically be displayed.
Of course, this file will come with predesigned information that you can edit and place your business data.

Start editing company data
If you want to place your company's data on the invoice, then you must locate the "company configuration" tab, which is located at the bottom of the invoice. In this way, you can correctly add your business information.
Important: Fill in each of the boxes that appear.
Instantly, you can see how these data are reflected in the invoice you are making.

Add the representative company logo
If you want to get a professional invoice for your business, yes or yes, you will have to add the logo that represents your business. This emblem will be the face of your company in front of customers when it comes to charging your services or products.
To add a logo, you will have to right-click on the “replace logo” tab. Next, a dialog box will appear, again click on the “replace image” option. Then, select the folder where you have the image stored.
Replace the currency format
Remember that, this Excel spreadsheet is predesigned and by default, it comes in the configuration in Euros. However, making a change is extremely easy.
First, you will have to go to the “ Number ” group, which is in the ribbon at the top of the screen (we have indicated you with a red circle where you have to go) select the currency of your country.

Keep in mind that, for all changes to be applied, you will have to place yourself in each cell where you want to make the changes by choosing the corresponding currency.
Best of all, you can use this Excel invoice format several times with different customers.
If you want to use this document again, but for another person, you will only have to change the information contained in the invoice relating to the previous customer
Important data about the Excel Invoice
If you want to have a copy of each one of the invoices issued, it is advisable to download the original template and store the new version with the name of “copy”, and on top of this last one, you make the editions that you might require.
DISCLAIMER The information provided in this article is for general informational purposes only. All efforts have been made to provide accurate information in this document, however, it should not be perceived as professional or legal advice. The reader should consult a professional before making any decision based upon this document. Under no circumstance, the author or the publisher shall have any liability to you for any loss or damage of any kind incurred as a result of the use of this information.
Post a Comment
Post a Comment
Every comment is admirable but you should always remember that all spam comments will be deleted, including mentioning your blog.
Thanks for understanding!